Stenciled Watercolor Star Card
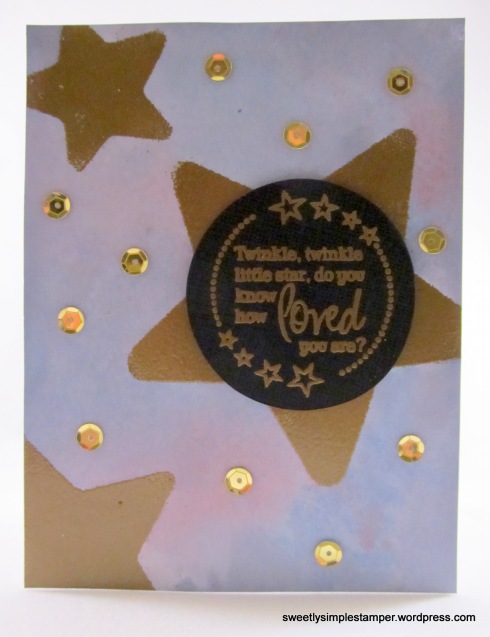
Here’s another card inspired by Day 2 of the Stenciled Online Card Class. I used watercolor pencils (using a wet brush to touch the tip of the pencil and then the cardstock) and a star stencil that I made on my Silhouette Cameo.
Here is the result:
I like how the softness and imperfection of the background contrasts with the focused and bold sentiment.
Thanks for taking a look!
– Mindy : )
Supplies:
Stamp: “Your Love is My Strength” (Hero Arts for Operation Write Home Woodblock Stamp Set LP278)
Other: Watercolor Pencils (Kimberly), Tim Holtz Faded Jeans Distress Stain (Ranger), Versamagic Cloud White Chalk Ink (Tsukineko) or Clear Embossing Ink (Stampendous), White Zing Embossing Powder (American Crafts), Heat Tool (Martha Stewart), Paper Trimmer (Tonic), Silhouette Cameo (Silhouette America), Chipboard (Silhouette), Blue Painter’s Tape (3M), Advanced Tape Glider (ATG) and Adhesive (Scotch), Foam Mounting Tape (3M), Wax Paper, Paint Brush and Cup of Water
Stenciled Valentines Card
Hi! I just wanted to share a quick card from my Day 2 Stenciled Homework. Day two of the Stenciled Online Card Class covered template techniques.
Inspired by one of Kristina Werner’s videos, I made a Valentines card.
To be honest, I was trying to make it a one-layer card – but I got some red smudges near my original sentiment (it happens, right?!), so I added my sentiment on another layer instead. And since it looked a little too plain, I added the stamped zig-zags near the sentiment to add another pop of red (within the heart I had used the same zig-zag stamp and also criss-crossed a couple of zig-zags so that gave it that rectangular graphic effect).
Thanks for taking a look and hope you have a great week!
-Mindy : )
Supplies:
Stamps: Zig Zag Thanks (Hero Arts), Happy Valentines Day (Craftsmart)
Other: Memento Lady Bug Dew Drop Ink (Tsukineko), Versafine Onyx Black Archival Ink (Tsukineko), Paper Trimmer (Tonic), Blue Painter’s Tape (3M), Plastic Heart Stencil, Makeup Sponge, Advanced Tape Glider (ATG) and Adhesive (Scotch)
Stenciled Cards with Sequins
Just wanted to share two more Day 1 “homework” cards that I made for the Stenciled Online Card Class. My first two cards are here.
For this next card, I again cut my stencil out of Silhouette Chipboard on my Silhouette Cameo.
And again I thought I’d experiment with supplies I already had, so I used some Memento Dew Drop Dye ink that I had with some makeup sponges that I already had.
Here is the result . . .with my sentiment panel covering up a smudgy mistake:p and some added sequin embellishments in a kind-of chevron design . . .
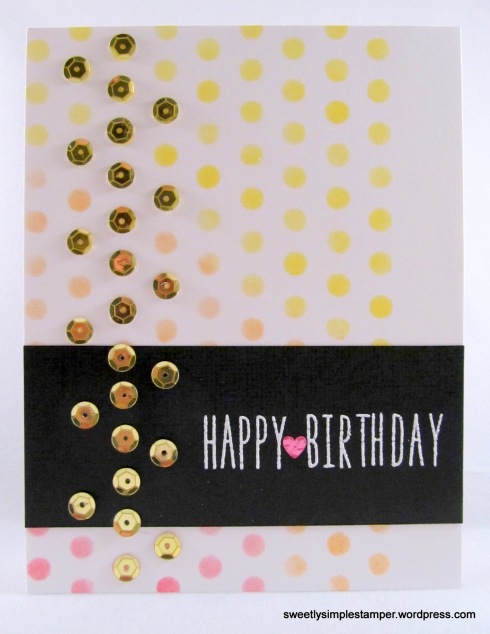 Inspired to adapt a technique that Laura Bassen taught in her Day 1 video, I took out a plastic hearts and stars stencil that I’ve had for a long time and used it with some gold pigment ink and embossing powder. I made the background with some Tim Holtz Distress Stain – I applied the stain to some wax paper and added some water and then swiped my card stock through it.
Making cards with stencils is sure messy but fun too!
– Mindy : )
Supplies:
Stamps: Milo’s ABC’s (Lawn Fawn), Little Star (Verve Stamps)
Other: Plastic Star Stencil, Tim Holtz Barn Red Distress Stain (Ranger), Tim Holtz Faded Jeans Distress Stain (Ranger), Versamagic Cloud White Chalk Ink (Tsukineko), White Zing Embossing Powder (American Crafts), Gold Pigment Ink, Gold Embossing Powder, Heat Tool (Martha Stewart), Memento Dew Drop Ink (Tsukineko), Paper Trimmer (Tonic), Silhouette Cameo (Silhouette America), Chipboard (Silhouette), Blue Painter’s Tape (3M), Advanced Tape Glider (ATG) and Adhesive (Scotch), Wax Paper, Gold Sequins, Glossy Accents (Ranger), Pick-Me-Up Tool (Silhouette)
Note: Stencil made from Silhouette Polka Dot “Page Dividers” Shape
Stenciled Hexagon Happy Birthday Cards
Yesterday was the first day of the “Stenciled!” Online Card Class and the topic was inking and misting. My “homework” was inspired by the techniques that Jennifer McGuire and Julie Ebersole shared in their Day 1 Class videos.
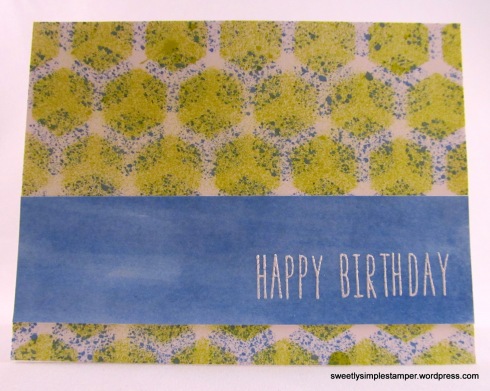
I cut the hexagon stencil on my Silhouette (out of the Silhouette Chipboard) and I secured the stencil on the cardstock with painter’s tape on a working surface. For these cards, I used Distress Stain – I took off the applicator of the ink I wanted and poured it into a little mister that I already had (it was part of a travel toiletries kit). For the first card, I mixed some blue and yellow stain to make a light green in the first card. It was fun getting inky – I have never really used these tools or misting techniques before, so I had fun experimenting with it – and by the end my hands were covered in ink too!
Here is my “Speckled” Card:
And here is my “Bold” Card:
 Birthdays always seem to sneak up on me, so I thought I’d turn my creations into birthday cards to have on hand. I used Lawn Fawn’s “Milo’s ABC’s” to make a “Happy Birthday” sentiment.
Thanks for taking a look and hope you enjoy making your own creations!
-Mindy : )
Supplies:
Stamps: Milo’s ABC’s (Lawn Fawn)
Other: Tim Holtz Barn Red Distress Stain (Ranger), Tim Holtz Distress Stain Mustard Seed (Ranger), Tim Holtz Faded Jeans Distress Stain (Ranger), Versamagic Cloud White Chalk Ink (Tsukineko), White Zing Embossing Powder (American Crafts), Heat Tool (Martha Stewart), Memento Lady Bug Dew Drop Ink (Tsukineko), Paper Trimmer (Tonic), Silhouette Cameo (Silhouette America), Chipboard (Silhouette), Blue Painter’s Tape (3M), Advanced Tape Glider (ATG) and Adhesive (Scotch)
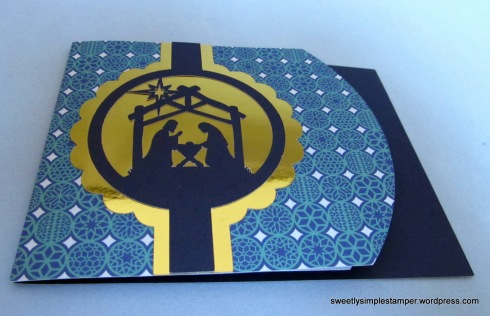
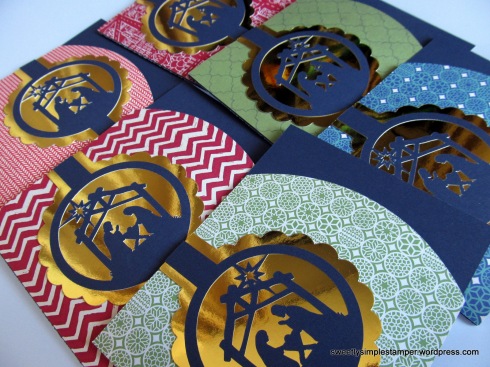
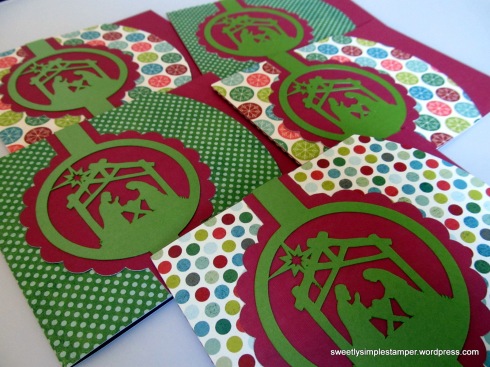
Silhouette Christmas Nativity Cards
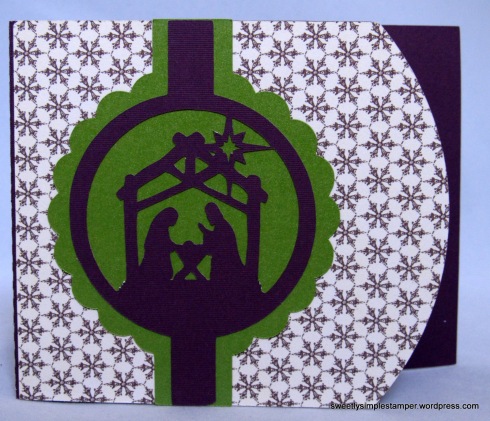
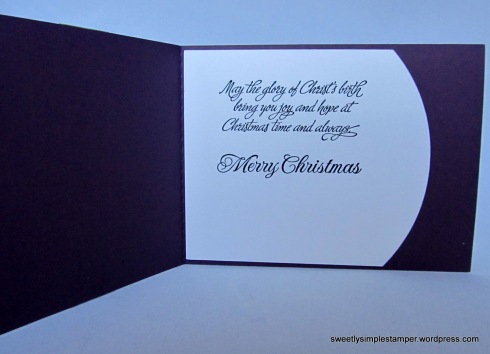
Just wanted to share a few peaks of the personal Christmas cards I made recently. I had fun playing around with some supplies I already had and that led me to try some different color combinations.
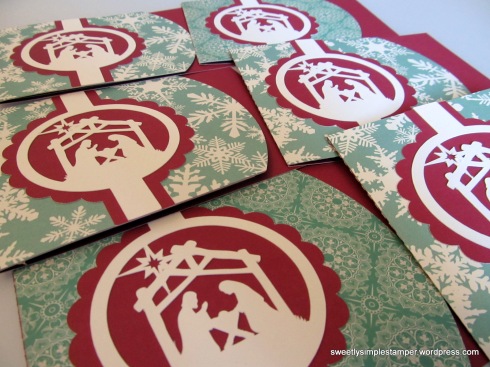 Hope you have a Merry Christmas!
– Mindy : )
Supplies:
Silhouette File: Christmas Nativity Card (by Lori Whitlock)
*note: I made the card liner myself by using the inset feature to alter the card cover file in Silhouette Studio
Stamps: Glory of Christ (Stampabilities GR1143) and Merry Christmas 07 (Stampabilities DR1105)
*note: I took the rubber stamps off the wood blocks and mounted them on a clear block together so I would only have to align them to each other once
Other: Wonderland 6×6 Paper Pad (Studio Calico), Winter Wonderland 6×6 Designer Paper Pad (My Mind’s Eye), Holiday Scrapbook Basics (Making Memories), Kiwi Metallic Cover (The Paper Company), Gold Cardstock, Classics Textured Cardstock Stack (DCWV), Solar White Coverstock (Neenah), Versafine Onyx Black Archival Ink (Tsukineko), Silhouette Cameo (Silhouette America), Advanced Tape Glider (ATG) and Adhesive (Scotch), 2 Way Glue Pen (Zig Memory System)
Holiday Treat Labels
Well after a cross-country move and a long absence from blogging, here’s a quick post to share with you!
Recently I needed to bake and wrap some brownies for a party. I kept the baking simple (I just used a box mix and added some extra chocolate chips:). Then I pushed through individually wrapping each of the brownies with cling wrap and clear tape while I had HGTV on in the background. Since I had some sticker paper left over from another project, I thought I’d make some festive treat labels in Silhouette Studio. The print and cut feature made it super easy! (Although it would have been even easier if I had saved my file before my computer decided to shut itself off in the middle of making them– oops!).
Anyways, here is a picture:
Hope you are enjoying some yummy treats this holiday season!
– Mindy : )
Silhouette Designs:
Lw tall sketch font by Lori Whitlock
Christmas Holly Wreath by Jamie Koay
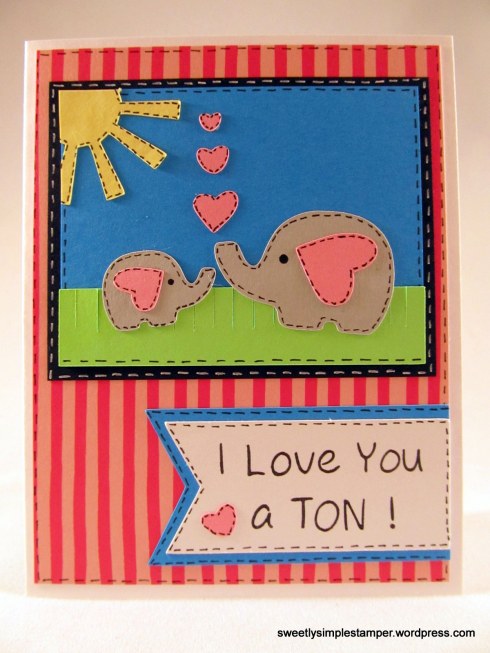
I Love You a TON Elephant Card
This week’s Midweek Throwdown Challenge at Operation Write Home is Cards 4 Kids!
I love making kid-friendly cards (my “I Wheelie Miss You!” Card was featured as a sample this week : ) and for this challenge I thought would make another card with a punny sentiment – as well as some elephant die cuts and cheerful colors:
I drew on the eyes and added some faux stitching to my diecuts with pens to add some definition and make it look quilted. I hope a hero will enjoy sending it home once I mail it off to OWH!
Thanks for taking a look and hope you are having a great week!
-Mindy : )
Supplies:
Diecuts: elephants (by Rivka Wilkins in Silhouette Store), grass – from peeping bunny placecard (by Pebbles in my Pocket in Silhouette Store), sun (by Silhouette)
Stamps: Sentiment made with Jessie’s ABC’s (Lawn Fawn)
Other: Color Crush 6 x 6 Paper Pad (American Crafts), Layering Paper (Recollections), Versafine Onyx Black Archival Ink (Tsukineko), Millenium 03 Archival Pen (Zig Memory System), White Medium Gel Pen (Pentel), Paper Trimmer (Tonic), Silhouette Cameo (Silhouette America), Advanced Tape Glider (ATG) and Adhesive (Scotch), 2 Way Glue Pen (Zig Memory System), MONO Multi Glue (Tombow)
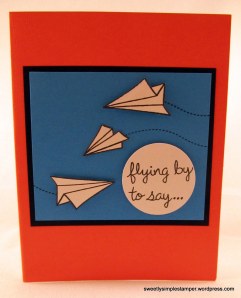
Flying By Cards
I had fun making some of these paper airplane cards awhile back in a bunch of different color combinations (including this one that said “Thanks!” on the inside):
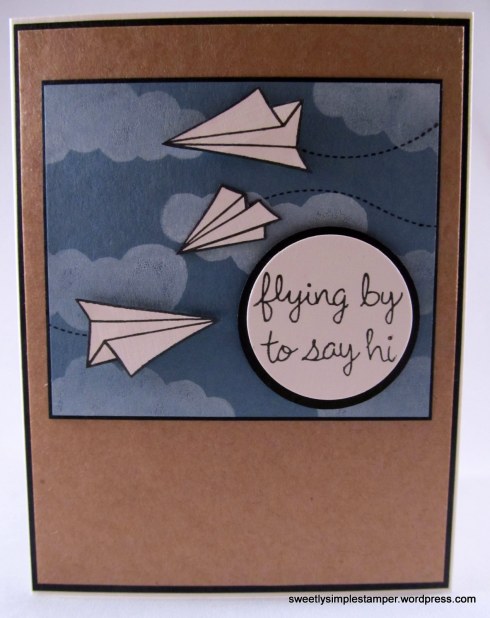
Since this week’s OWH Midweek Throwdown Challenge was “Things with Wings,” I thought I’d revisit my original design and try a couple new twists on it and add a couple more cards to my box for OWH.
I used patterned paper on this card:
And for this card, I stamped a cloudy background for the paper airplanes
For some dimension, on all three cards I popped the larger airplanes and the sentiment with foam mounting tape. To split the sentiment to fit on my 1 1/2″ punched out circle, I used a post-it note to mask off the part I didn’t want to stamp. Also, on my newer designs, after fussy cutting out the airplanes with my smaller pair of scissors (which wasn’t too difficult with all the straight images on the airplane), I ran a calligraphy pen around the edges just to make sure I’d have nice, crisp cut-out images with no white spots on the edges.
Thanks for taking a look!
-Mindy 🙂
Supplies:
Stamps: “flying by to say hi” Sentiment and Paper Airplanes clear stamps (Flying By Set from Lawn Fawn), ellipsis (made using Jessie’s ABC’s (Lawn Fawn), Cloud Clear Stamp (Perfectly Perfect Day Set by Avocado Arts)
Other: Fact 6 x6 Paper Pad (Basic Grey), Kraft Cardstock (Paper Studio), Versamagic Cloud White Chalk Ink (Tsukineko), Versafine Onyx Black Archival Ink (Tsukineko), Marvy Memories Pigmented Calligraphy Pen (Uchida), Paper Trimmer (Tonic), Detail Scissors (X-Acto), Silhouette Cameo (Silhouette America), Advanced Tape Glider (ATG) and Adhesive (Scotch), 2 Way Glue Pen (Zig Memory System), Foam Mounting Tape (3M)
Elegant Tag for Wedding Day Kit for Bride
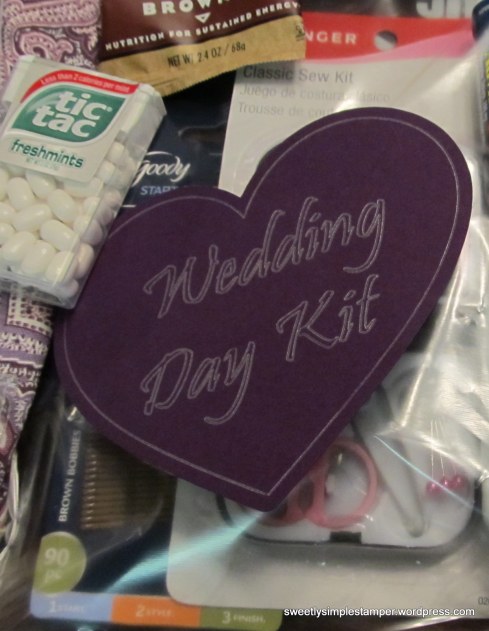
I have a friend getting married soon, so I put together a little Wedding Day “Survival Kit” for her as a pre-wedding gift and mailed it off to the bride-to-be.
Here are some of the things I included:
Kleenex
Protein Bar
Breath Mints
Single-use Toothbrushes
Floss
Nail File
Nail Polish Remover Pads
Sewing Kit
Safety Pins
Shout Wipes
Hand Wipes
Face Blotting Papers
Bobby Pins
First Aid Kit
Ibuprofen
Chalk (I read it can cover up smudges on a wedding dress)
Straw (to sip on a drink without messing up makeup)
(Note: Since I was mailing the kit, I didn’t include liquid items like hairspray and lotion because although they would be helpful, I thought they might spill and ruin everything else in the kit).
Also, since I was mailing this kit to my friend, I sealed everything in a gallon Ziploc bag and to add some pizazz, I attached a tag that I made on my Silhouette Cameo to the outside of the Ziploc bag. I put the whole Ziploc bag in a larger tote bag and added another tag with the bride’s name on it to the handle of the tote bag.
Although I hope my friend won’t really need to use much in this kit on her wedding day, I hope she will appreciate the thought behind it and will feel prepared for her wedding day – whatever happens that day! I always joke that if you remember to carry an umbrella, it won’t rain, but if it does rain, at least you will be prepared!
-Mindy 🙂
P.S. If you like simple Silhouette projects, check out my easy thank you cards here.
Tag Instructions:
I used the Silhouette Studio software to design my simple tag – starting with what I wanted sketched out: one heart and the “Wedding Day Kit” phrase in the font Pristina. Under the cutting settings, I selected the sketch setting and I loaded my mat with my purple cardstock and used the Silhouette Cameo to sketch the text and heart with the Silver Silhouette Sketch Pen loaded in place of the blade. Then I did not unload my mat, and in my Silhouette Studio file I added an outline to the sketched heart that I would cut out. I removed what had been sketched (the phrase and original heart), leaving only the outline heart, and I changed the setting from sketch to cut. Then I cut out my tag and it was ready for adhesive and attachment to the bag!
Supplies:
Diecut: Heart from “mason jar with hearts” (by Lori Whitlock, Silhouette Online Store)
Font: Pristina
Other: Purple Cardstock, Silver Sketch Pen (Silhouette), Silhouette Cameo (Silhouette America), Advanced Tape Glider (ATG) and Adhesive (Scotch)
Trying a 6 x 6 Cutting Formula for Christmas and Winter Cards
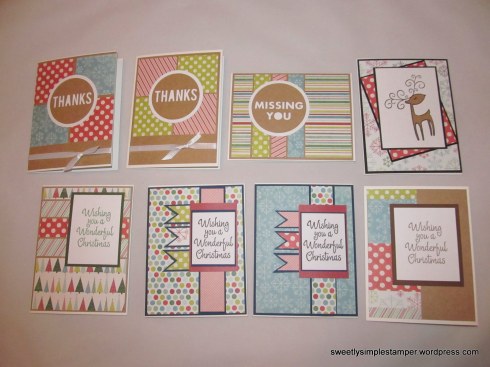
Thanks to Kathryn’s 6×6 formulas she shared on her blog here and with OWH, I got an early start on some Christmas and winter cards for OWH. Kathryn gave great directions and pictures on her post and it gave me the push to just jump into an unused 6 x 6 pad and get moving on making cards! I used her template #2 to make eight cards from six double-side 6 x 6 papers from My Mind’s Eye Winter Wonderland pad. (I did make a tiny cutting goof and so my last card, the bottom right one, wasn’t part of the cutting formula but my improvised version to still use my paper and make eight cards!).
I had some leftover “thanks” kraft cardstock circles from this set of cards, so I used them on a couple of winter cards here and made a missing you circle for a card on my silhouette too. The little reindeer is paper-pieced with kraft cardstock as well. I may have gone a little crazy with the kraft cardstock, but I’m glad I branched into some other colors of layering paper too. I think the navy layering paper worked really well for the cards with the little banners (and you can’t really tell from the small picture, but the red paper on those cards is actually a red wood grain patterned which is why I didn’t want to cover it up completely).
Thanks for taking a look and have a great day!
-Mindy
Supplies:
Stamps:”Wishing You a Wonderful Christmas” Cling Stamp (Hero Arts’ Wonderful Christmas CG394, part of a prize pack I won last year – thanks Hero Arts!),Winking Reindeer Wood Block Stamp (Hero Arts’ H5457, thanks to a stocking stuffer from my husband last year)
Diecut: thanks (by Silhouette)
Other: Winter Wonderland 6 x 6 Paper Pad (My Mind’s Eye), Kraft Cardstock (Paper Studio), Paper Trimmer (Tonic), Detail Scissors (X-Acto), Silhouette Cameo (Silhouette America), Advanced Tape Glider (ATG) and Adhesive (Scotch), 2 Way Glue Pen (Zig Memory System)


